It is no secret that colors play an important role on any website, that’s why they are referred to as marketing factors. In terms of engaging visitors to your website, it can be the best way to attract their attention. People often forget and ignore this little detail when covering other aspects of their website.
While WordPress sites allow you to change colors, they can be difficult and confusing at the same time. In this article, we are going to address the 3 most popular ways to change link color in WordPress. So keep connected with us.
Change Link Color Via the WordPress Customizer
You can change the color of the links on WordPress very easily without having any knowledge of coding. It can quickly be done through the customization menu from the admin bar. Here I’m going to show you all steps you need to know to change the link color. I am using Astra as the theme for this guide.
From your Dashboard click appearance, >>> Customize.
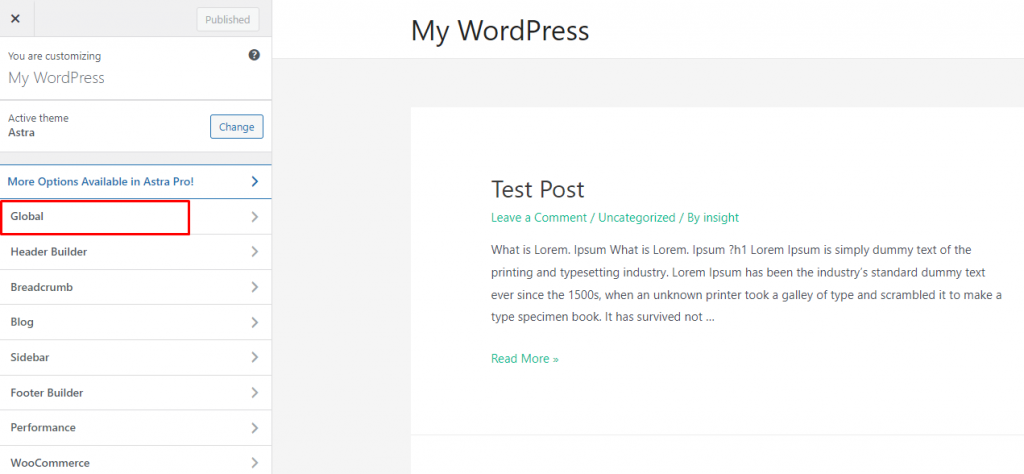
After that, you will be redirected to the page where all the customization options for your themes will be listed. In my case, I am using Astra themes, so I will find the options for changing the color of links on the Global Settings.
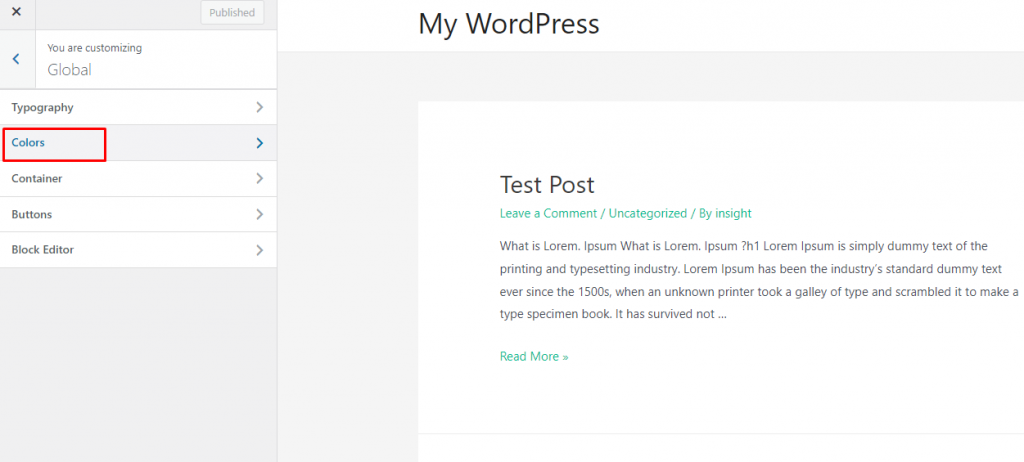
Then, click on colors.
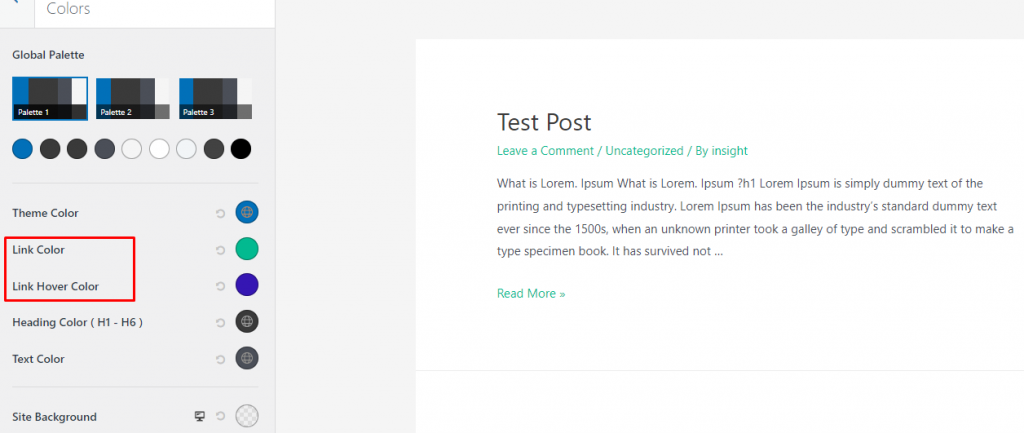
After clicking, you will see the option to change the link color and link hover color. Choose the color to match your website. When you are done hit the save button.
This way you can change the link color on other themes too. But you may have to find the option for changing the link color. Because not every theme has the same customization settings interface. All you have to do that find the color setting.
Using Custom CSS code
Through custom CSS code, you can change the link color also. The whole process is a little bit complicated, but it gives the flexibility to choose.
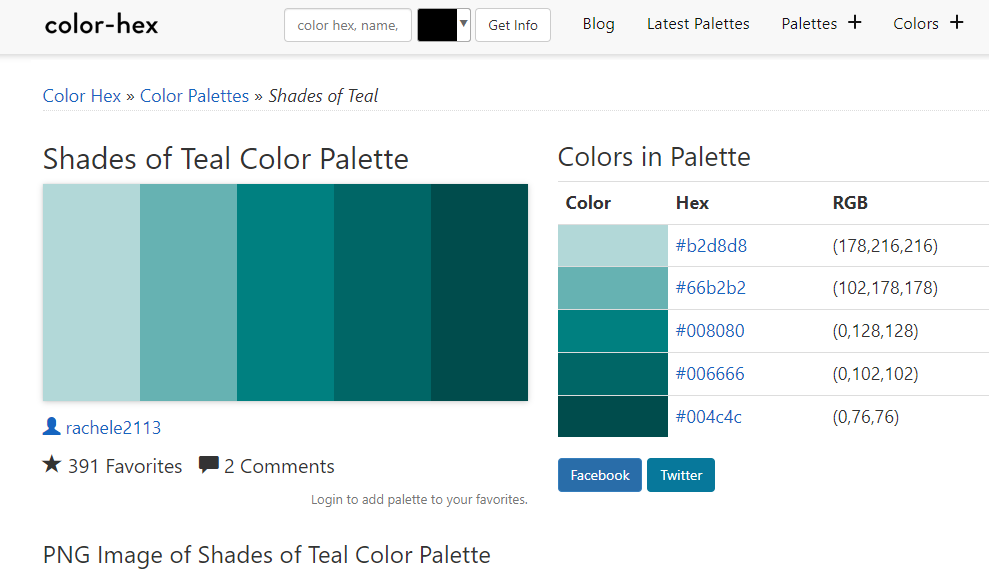
If you don’t know much about custom color codes then you can take help to choose colors from Color Hex. Here you can find all famous colors or particular shades which you can use easily on your website.
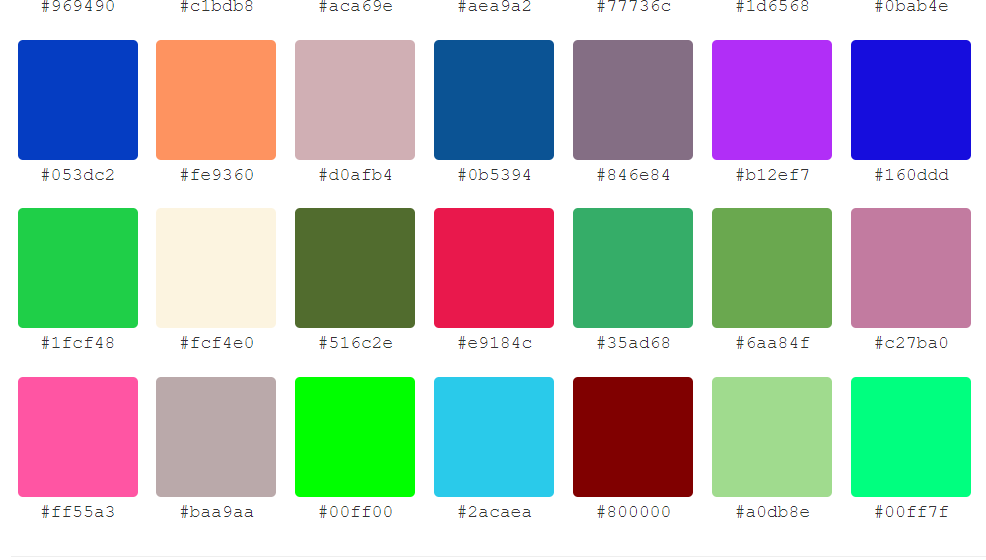
You may see a code under every color. Choose a color that you want to add to your website. After choosing, copy the specific code.
When you are done, log into the admin bar and click on Appearance >>> Customize.
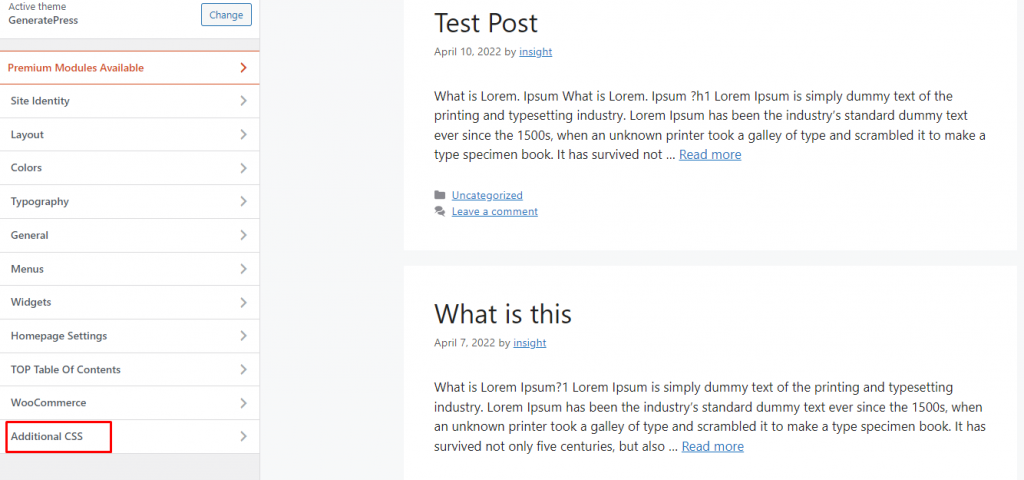
Now you will see an interface, which will show you a lot of options in your left-hand menu bar. Scroll down, in the bottom you will see Additional CSS, Click on it.
a {
  color; #0c9aa9
}
Just copy the above code and paste it into the additional CSS box. You can change the link color by replacing the color code with whatever you like or choose and hit the publish button.
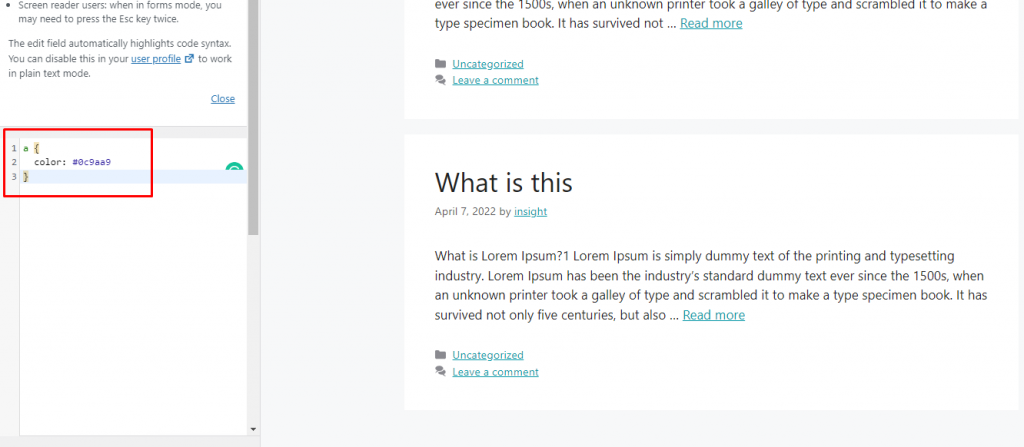
Now, you should be able to see the change in the link color. If you are not happy with this color then you can change the link color any time through this process. After each change doesn’t forget to hit the publish button.
With Elementor page builder
In WordPress World, Elemontor is the most active and popular page builder plugin. According to Wikipedia, it has 5 million active installations. With Elementor editor, you can change the link color easily. You just have to follow a few steps.
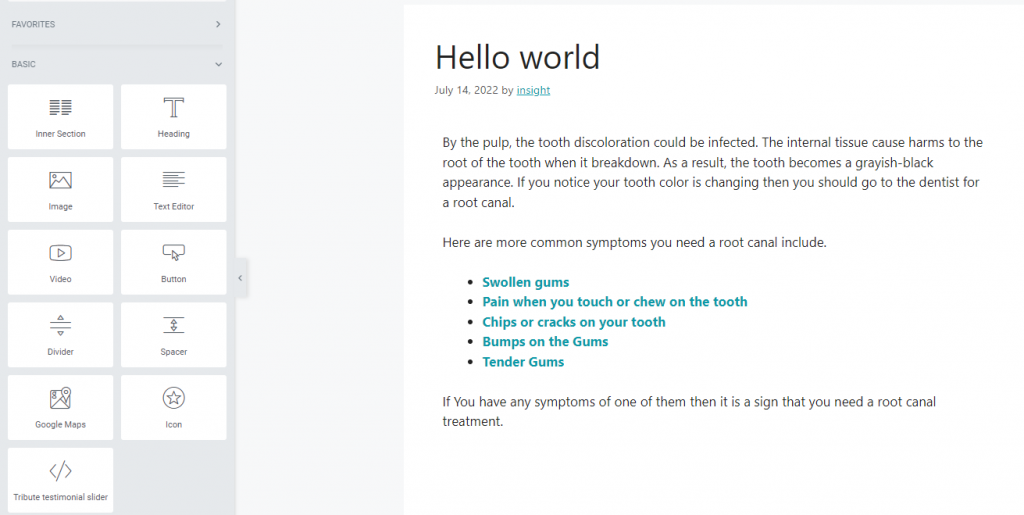
Top corner in the left section you can see the Hamburger icon, click on it. After that click on site settings.
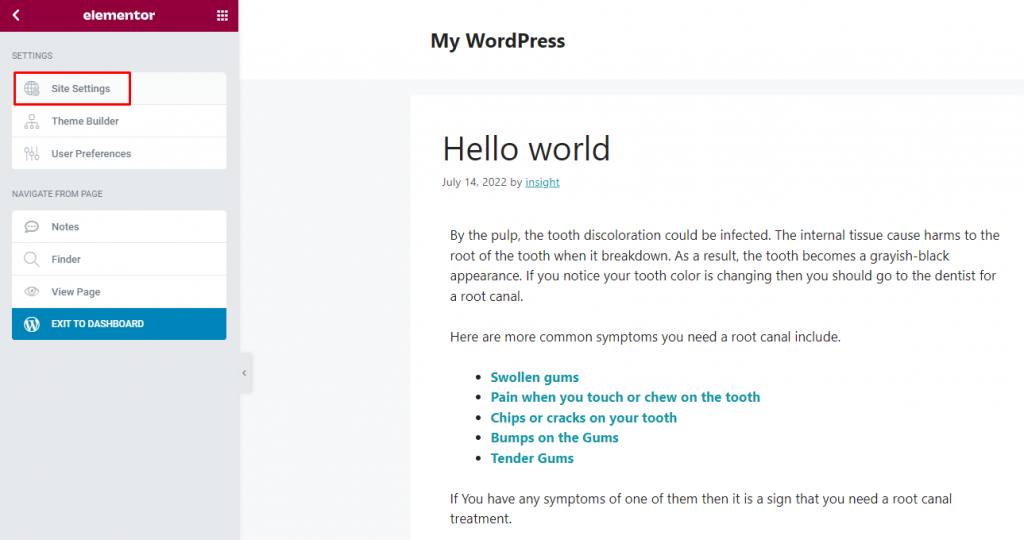
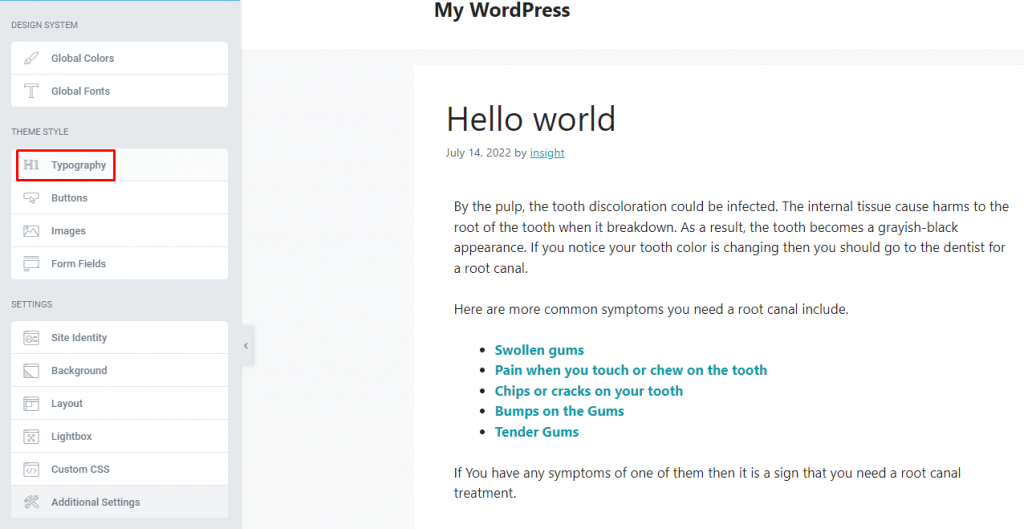
To change the link color, open the “Typography” tab.
Here you can see two options in the link section.
- Normal: To change link colors and fonts click on Normal.
- Hover: To change the link color when mouse on hover, click on hover.
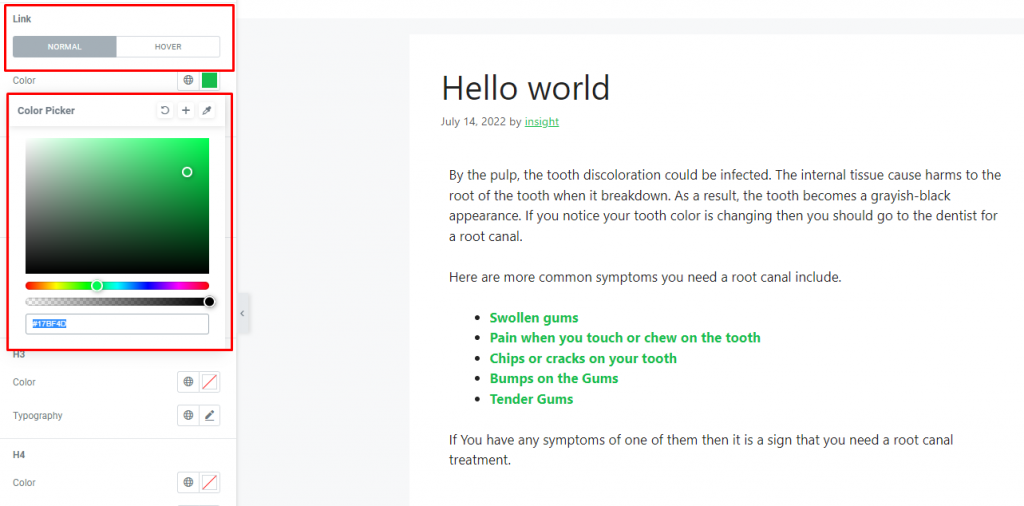
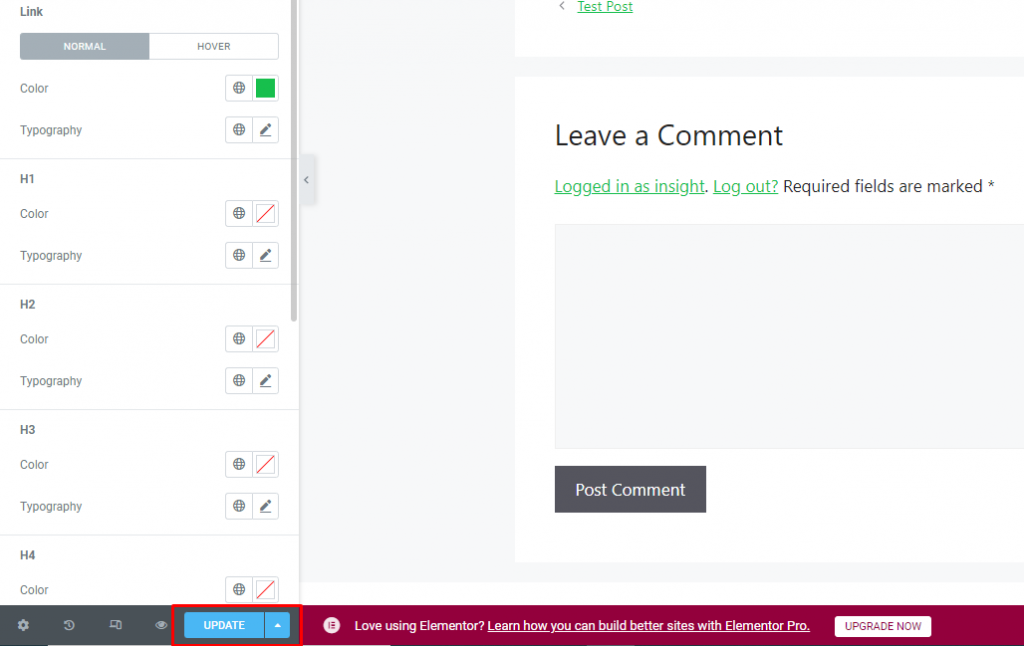
Now you should be able to see the changes in link colors. Once you have made all the changes, hit the blue update button to save them.
Conclusion
In this article, I have shown you 3 ways to change the link color in WordPress.
- WordPress’s Customization Page
- Custom CSS code
- Elementor
In 3 ways, which one did you find most convenient? And if you feel any problems or any issues with this article let me know in the comment below.
Other WordPress Guide Articles:


Post a Comment
You must be logged in to post a comment.